Creating a prayer site
If you created a ramadan campaign last year and are happy with the url, skip to the next section (Renewing your campaign).
If you did not create a ramadan campaign or want to change your url:
- Go to https://campaigns.prayer.tools/wp-signup.php
- Create your username and enter your email address
- Fill out your campaign info. Under Campaign Type make sure you choose Ramadan Template
- Open your email and Activate your site
- Save you password
- Open the new site
Renewing your campaign
- Go to your existing landing page. example: https://ramadandemo.pray4movement.org
- At the bottom of the page, click “Campaign Settings”
- Log in with your email and password
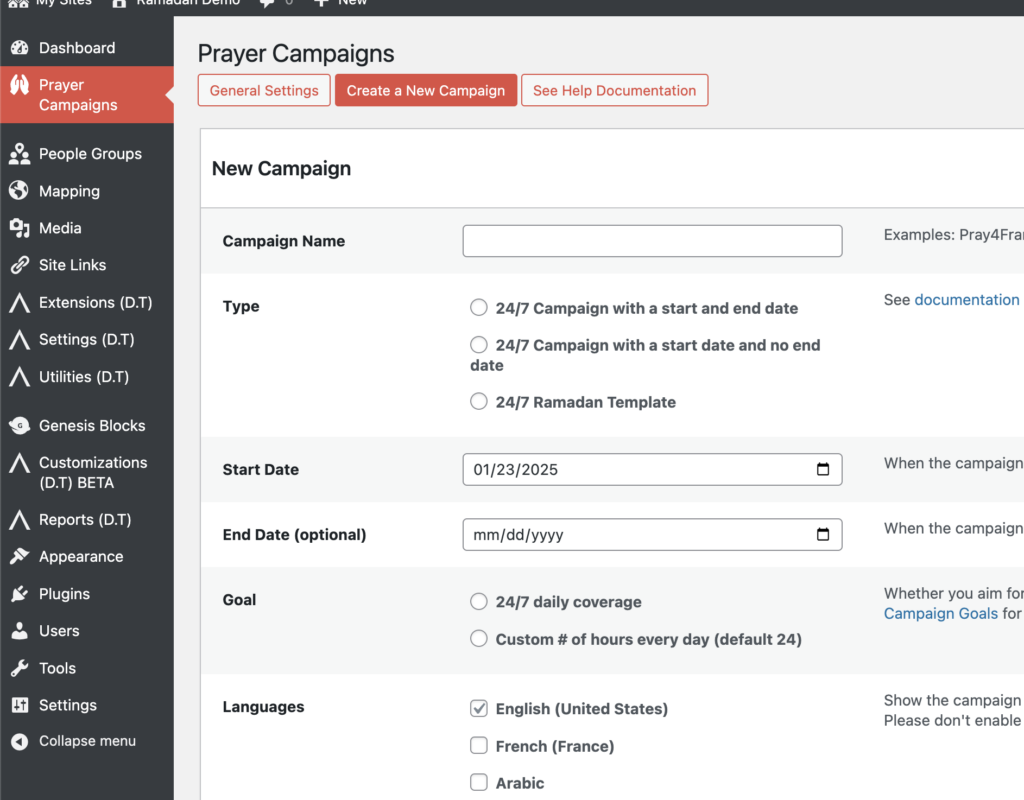
- At the top click on “Create a New Campaign”
- Add the Campaign Name according to your focus (ex: Pray4Morocco)
- Choose “24/7 Ramadan Template”
- Choose the dates, goal and languages
- Create Campaign

Continue customizing and customize
- Click “Show Landing Page” To see your page.
- Scroll down to the bottom of the landing page and click “campaign settings” to get back to the settings
- Some things to change could be the “Theme Color” and the default language.
- You can change the text or add custom translations from the “Text & Translations” tab, or directly from the Landing Page. See https://prayer.tools/docs/landing-page-title-and-content/ for more details.