Select your campaign and head over to the “Email Settings” tab.
Each campaign can have different email settings and different extra content.

Email sending settings
Here you can customize the email settings like name, address and logo.
This settings affect the emails the prayer warrior receives like the signup and prayer reminder notification emails.
See a list of the emails here.

‘From’ email address
When you send an email, the sender’s email address will show whatever is written in this field.
If left empty, emails will show the address:
‘From’ email name
When you send an email, the sender’s name will show whatever is written in this field.
If left empty, emails will show the name: Test
Email Header Logo
And the link to a logo you would like to use instead of the default Prayer.Tools logo.
You can upload a picture to the Media tab on the left and copy the image url from there.
Email Content Text
- Select Campaign to edit the email settings
- Sign Up and Notification Email Settings
- Extra Content Settings
Extra Content Settings

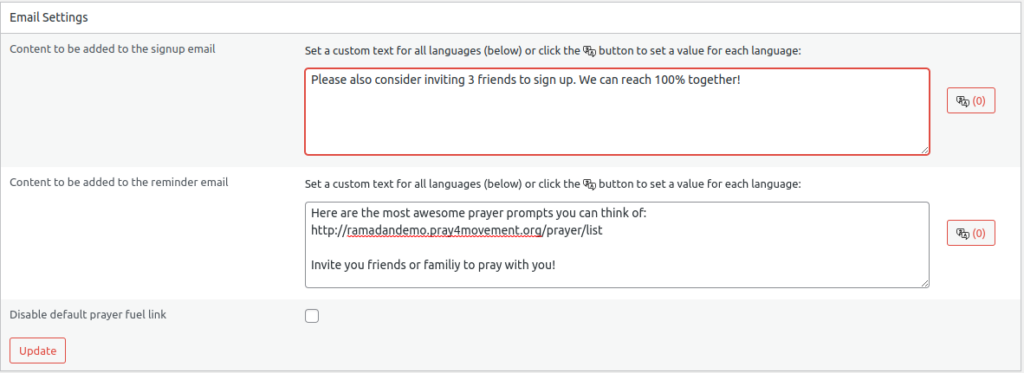
In this section, you can set custom texts for the signup email and the reminder email.
Content to be added to the signup email
When the signup email gets sent, you can add any message you want to it by typing it in this box.
It will be added towards the end of the sign up email:

Note: URLs pasted in will be changed into links.
Content to be added to the reminder email
When the emails that remind your users to pray get sent, you can add any message you want to it by typing it in this box.
It will be added towards the end of the notification email:

If you wish to disabled the default prayer fuel link, set the setting in the setting above:

Note: URLs pasted in will be changed into links.
Translations

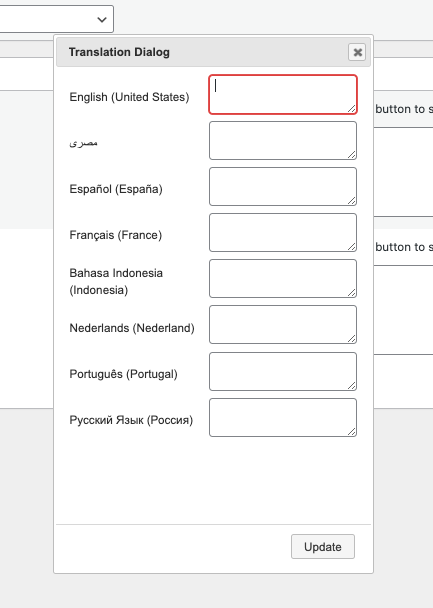
If you have several translations available on your Prayer Campaign, you can customize the additional email texts.
Just click the translation icon next to the box you want to translate and write the translated text for the relevant languages.
You can always add or edit the languages that appear in this dialog box from the Language Settings section in the Landing Page Settings page.